Download Word 2016: Core Document Creation, Collaboration and Communication.77-725.BrainDumps.2019-05-18.11q.tqb
| Vendor: | Microsoft |
| Exam Code: | 77-725 |
| Exam Name: | Word 2016: Core Document Creation, Collaboration and Communication |
| Date: | May 18, 2019 |
| File Size: | 2 MB |
How to open TQB files?
Files with TQB (Taurus Question Bank) extension can be opened by Taurus Exam Studio.
Purchase
Coupon: TAURUSSIM_20OFF
Discount: 20%
Demo Questions
Question 1
Project 2 of 7: Bakery Letter
Overview
As the marketing manager for Liberty’s Delightful Sinful Bakery and Café, you want to inform local businesses that you will now be providing catering services.
December 31, 2018
CATERING SERVICES ARE NOW AVAILABLE
Dear Business Owner:
Liberty’s Delightful Sinful Bakery and Café would like to inform you that beginning next month, we will be providing catering and delivery services in your area. We invite you to look over our lunch catering menu below, and contact us to schedule your next business meeting lunch.
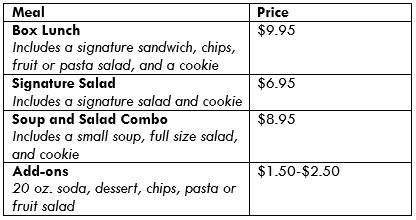
The menu above is a small sample of the options we have available. Liberty’s Delightful Sinful Bakery will impress you with excellent service and great food at an affordable price.
We look forward to hearing from you to cater your next meeting.
Sincerely,
Steve Lasker
Owner
Remove all personal information from the document.
- See the explanation below.
Correct answer: 1
Explanation:
1. Create a copy of your original document by clicking on the File tab, and then Save As. 2. In the copy of the original document, select the File tab, then click on Info. 3. Click on Check for Issues, and then select Inspect Document. 4. In the Document Inspector dialog box, check the boxes to select the types of hidden content you want to be inspected, in this case it would be personal information and then click Inspect. 5. Review the results, then click Remove All next to the inspection results. References:https://support.office.com/en-us/article/Remove-hidden-data-and-personal-information-by-inspecting-documents-presentations-or-workbooks-356b7b5d-77af-44fe-a07f-9aa4d085966f 1. Create a copy of your original document by clicking on the File tab, and then Save As.
2. In the copy of the original document, select the File tab, then click on Info.
3. Click on Check for Issues, and then select Inspect Document.
4. In the Document Inspector dialog box, check the boxes to select the types of hidden content you want to be inspected, in this case it would be personal information and then click Inspect.
5. Review the results, then click Remove All next to the inspection results.
References:
https://support.office.com/en-us/article/Remove-hidden-data-and-personal-information-by-inspecting-documents-presentations-or-workbooks-356b7b5d-77af-44fe-a07f-9aa4d085966f
Question 2
Project 3 of 7: Service
Overview
You are an administrative assistant for Fabrikam, Inc.’s Field Service division. You are preparing the monthly newsletter to be sent out to field service engineers.
Remember that mileage reimbursement claims must be submitted by the 15th of each month. Save the mileage form as a PDF file and email it to your regional supervisor.
Bonuses are Changing
New Depot Return Process
All offices have received the new tracking form for repair depot returns. Complete the following tasks when returning parts for repair:
Complete all fields in the Field Service section of the form.
Remove the top copy and file it in your office.
Securely attach the form to the part.
Package the part for shipment.
Ship to the home office and clearly label the box “For depot return”.
All returns must be shipped to the home office to receive credit. The regional depots will close in two months and will not be accepting return shipments.
Vice President’s Corner
NOTE TO SELF: If the VP doesn’t provide content by Wednesday, delete this section and put in something generic about customer satisfaction.
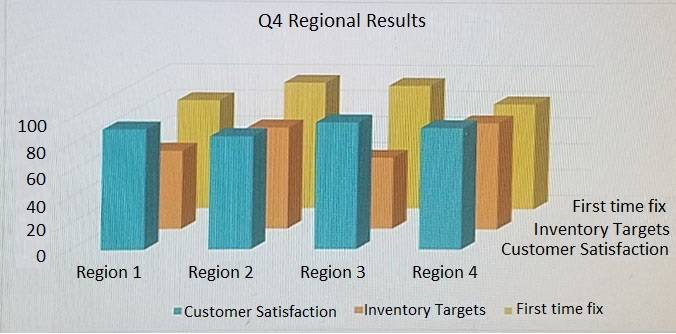
Quarterly Results
NOTE TO SELF: This is a placeholder charter. Update the chart after the actual results are available on Monday.
Use the Go To feature to navigate to the Bookmark “OldNews” and delete the paragraph at that location.
- See the explanation below.
Correct answer: 1
Explanation:
1. Click Bookmark from the Insert tab. 2. Click Name, to sort the list of bookmarks in the document. 3. Select “OldNews” from the list of bookmarks in the document then click Delete. 4. If a hyperlink has been inserted to the bookmark, right-click on the linked text, then select Remove Hyperlink. References:https://support.office.com/en-us/article/Add-or-delete-bookmarks-in-a-Word-document-or-Outlook-message-f68d781f-0150-4583-a90e-a4009d99c2a0 1. Click Bookmark from the Insert tab.
2. Click Name, to sort the list of bookmarks in the document.
3. Select “OldNews” from the list of bookmarks in the document then click Delete.
4. If a hyperlink has been inserted to the bookmark, right-click on the linked text, then select Remove Hyperlink.
References:
https://support.office.com/en-us/article/Add-or-delete-bookmarks-in-a-Word-document-or-Outlook-message-f68d781f-0150-4583-a90e-a4009d99c2a0
Question 3
Project 3 of 7: Service
Overview
You are an administrative assistant for Fabrikam, Inc.’s Field Service division. You are preparing the monthly newsletter to be sent out to field service engineers.
Remember that mileage reimbursement claims must be submitted by the 15th of each month. Save the mileage form as a PDF file and email it to your regional supervisor.
Bonuses are Changing
New Depot Return Process
All offices have received the new tracking form for repair depot returns. Complete the following tasks when returning parts for repair:
Complete all fields in the Field Service section of the form.
Remove the top copy and file it in your office.
Securely attach the form to the part.
Package the part for shipment.
Ship to the home office and clearly label the box “For depot return”.
All returns must be shipped to the home office to receive credit. The regional depots will close in two months and will not be accepting return shipments.
Vice President’s Corner
NOTE TO SELF: If the VP doesn’t provide content by Wednesday, delete this section and put in something generic about customer satisfaction.
Quarterly Results
NOTE TO SELF: This is a placeholder charter. Update the chart after the actual results are available on Monday.
Under the “New Depot Return Process” heading, format the five lines of text starting with “Complete all fields...” as a numbered list that has a parenthesis after the number.
- See the explanation below.
Correct answer: 1
Explanation:
1. Select the text you want to change into a list, in this case the five lines of text starting with “Complete all fields...”. 2. Go to Home, then select Numbering, then select Define New Number Format. 3. Select the desired font size, style and color. 4. Append the numbering with a parenthesis in the Number format field. 5. Ensure that the formatting and alignment is as desired, then click OK. References:https://support.office.com/en-us/article/Define-New-Bullets-Numbers-and-Multilevel-Lists-6c06ef65-27ad-4893-80c9-0b944cb81f5f#number 1. Select the text you want to change into a list, in this case the five lines of text starting with “Complete all fields...”.
2. Go to Home, then select Numbering, then select Define New Number Format.
3. Select the desired font size, style and color.
4. Append the numbering with a parenthesis in the Number format field.
5. Ensure that the formatting and alignment is as desired, then click OK.
References:
https://support.office.com/en-us/article/Define-New-Bullets-Numbers-and-Multilevel-Lists-6c06ef65-27ad-4893-80c9-0b944cb81f5f#number
Question 4
Project 3 of 7: Service
Overview
You are an administrative assistant for Fabrikam, Inc.’s Field Service division. You are preparing the monthly newsletter to be sent out to field service engineers.
Remember that mileage reimbursement claims must be submitted by the 15th of each month. Save the mileage form as a PDF file and email it to your regional supervisor.
Bonuses are Changing
New Depot Return Process
All offices have received the new tracking form for repair depot returns. Complete the following tasks when returning parts for repair:
Complete all fields in the Field Service section of the form.
Remove the top copy and file it in your office.
Securely attach the form to the part.
Package the part for shipment.
Ship to the home office and clearly label the box “For depot return”.
All returns must be shipped to the home office to receive credit. The regional depots will close in two months and will not be accepting return shipments.
Vice President’s Corner
NOTE TO SELF: If the VP doesn’t provide content by Wednesday, delete this section and put in something generic about customer satisfaction.
Quarterly Results
NOTE TO SELF: This is a placeholder charter. Update the chart after the actual results are available on Monday.
Add a Grid cover page.
- See the explanation below.
Correct answer: 1
Explanation:
1. Select Cover Page, from the Pages group on the Insert tab. 2. Select the grid cover page from the gallery of options. References:https://www.bing.com/search?q=microsoft%20word%202016%20grid%20cover%20page&qs=n&form=QBRE&sp=-1&pq=microsoft%20word%202016%20grid%20cover%20page&sc=1-35&sk=&cvid=4E8A362581D144B1AE8D42A91AD951F3 1. Select Cover Page, from the Pages group on the Insert tab.
2. Select the grid cover page from the gallery of options.
References:
https://www.bing.com/search?q=microsoft%20word%202016%20grid%20cover%20page&qs=n&form=QBRE&sp=-1&pq=microsoft%20word%202016%20grid%20cover%20page&sc=1-35&sk=&cvid=4E8A362581D144B1AE8D42A91AD951F3
Question 5
Project 3 of 7: Service
Overview
You are an administrative assistant for Fabrikam, Inc.’s Field Service division. You are preparing the monthly newsletter to be sent out to field service engineers.
Remember that mileage reimbursement claims must be submitted by the 15th of each month. Save the mileage form as a PDF file and email it to your regional supervisor.
Bonuses are Changing
New Depot Return Process
All offices have received the new tracking form for repair depot returns. Complete the following tasks when returning parts for repair:
Complete all fields in the Field Service section of the form.
Remove the top copy and file it in your office.
Securely attach the form to the part.
Package the part for shipment.
Ship to the home office and clearly label the box “For depot return”.
All returns must be shipped to the home office to receive credit. The regional depots will close in two months and will not be accepting return shipments.
Vice President’s Corner
NOTE TO SELF: If the VP doesn’t provide content by Wednesday, delete this section and put in something generic about customer satisfaction.
Quarterly Results
NOTE TO SELF: This is a placeholder charter. Update the chart after the actual results are available on Monday.
On the page following the section break, change the page orientation to Landscape.
- See the explanation below.
Correct answer: 1
Explanation:
1. Select the page following the section break, which is the page you want to change to Landscape. 2. Click on Layout, then open the Page Setup dialog box. 3. Select Landscape, and in the Apply to box, choose the Selected text option. 4. Click OK. References:https://support.office.com/en-us/article/Change-page-orientation-to-landscape-or-portrait-9b5ac1af-9998-4a37-962b-a82b689572a9 1. Select the page following the section break, which is the page you want to change to Landscape.
2. Click on Layout, then open the Page Setup dialog box.
3. Select Landscape, and in the Apply to box, choose the Selected text option.
4. Click OK.
References:
https://support.office.com/en-us/article/Change-page-orientation-to-landscape-or-portrait-9b5ac1af-9998-4a37-962b-a82b689572a9
Question 6
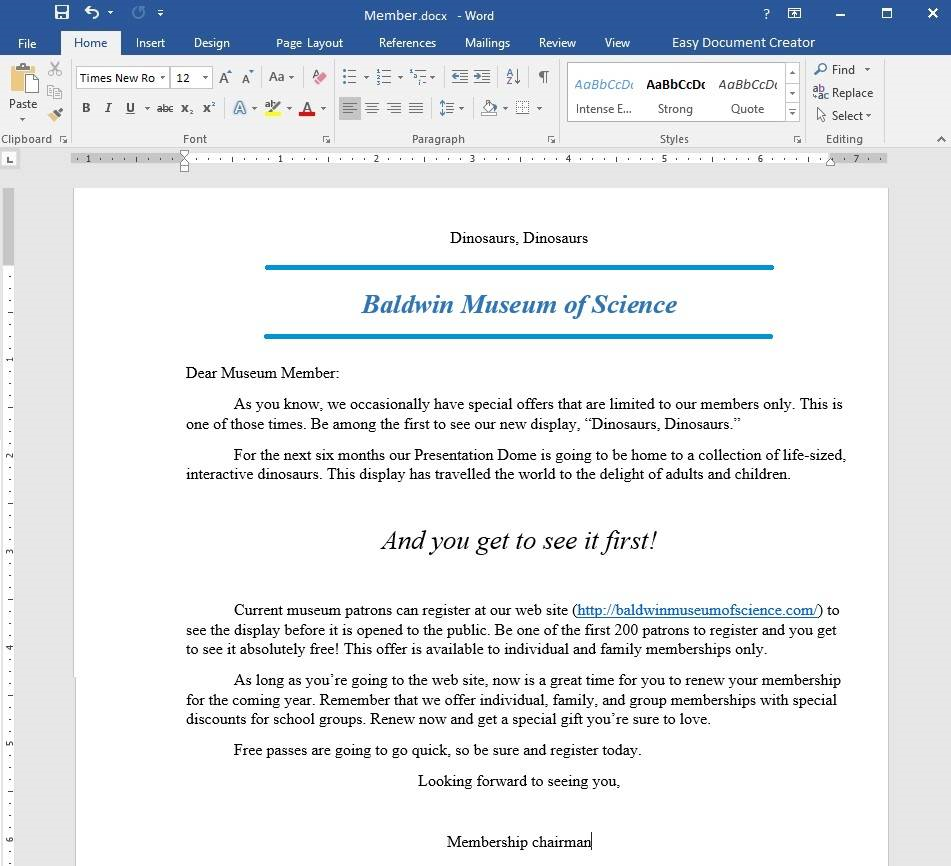
Project 4 of 7: Member
Overview
You are preparing a letter to museum members announcing a new exhibit and urging them to renew their membership.
Add a 12-Point Star with the text “Limited Offer”. Align the star to the bottom-left of the page.
- See the explanation below.
Correct answer: 1
Explanation:
1. Select Shapes from the Insert tab. 2. Click on the 12-Point Star which is the desired shape. 3. Right-click on the shape and select Add Text, then type in “Limited Offer”. OR 1. Select Shapes from the Insert tab. 2. Click on the 12-Point Star which is the desired shape. 3. Start typing “Limited Offer”. 4. To align the text choose the options from the Font, Paragraph, or Alignment groups from the Home tab. 5. To align the shape, manually drag it to the bottom-left of the page. References:https://support.office.com/en-us/article/Add-shapes-0E492BB4-3F91-43B5-803F-DD0998E0EB89 1. Select Shapes from the Insert tab.
2. Click on the 12-Point Star which is the desired shape.
3. Right-click on the shape and select Add Text, then type in “Limited Offer”.
OR
1. Select Shapes from the Insert tab.
2. Click on the 12-Point Star which is the desired shape.
3. Start typing “Limited Offer”.
4. To align the text choose the options from the Font, Paragraph, or Alignment groups from the Home tab.
5. To align the shape, manually drag it to the bottom-left of the page.
References:
https://support.office.com/en-us/article/Add-shapes-0E492BB4-3F91-43B5-803F-DD0998E0EB89
Question 7
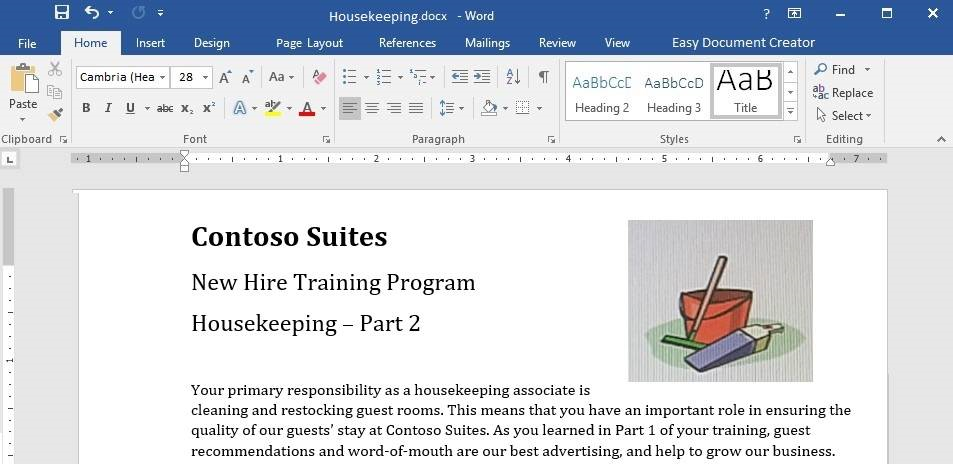
Project 5 of 7: Housekeeping
Overview
You are helping to write training program modules for Contoso Suites. You are editing the second module for housekeeping associates.
Start of Shift
The first thing you should do when you start your shift is check your schedule. The shift supervisor will provide you with a printed schedule listing the rooms for which you are responsible, and a recommended order for cleaning the rooms. Unless an early cleaning is requested by the guest, check-out rooms are given priority so that we can prepare them for the next guests.
Use the inventory checklist attached to your cleaning cart to make sure that your cart is fully stocked before you begin your rounds.
Room Cleaning
When you are ready to clean a room, knock and announce yourself as “Housekeeping.” Give the guest sufficient time to respond (10 to 15 seconds). If the guest does not respond, let yourself into the room and begin cleaning.
Start by cleaning the common room and sleeping areas. It is best to follow consistent steps when cleaning rooms. This will help to prevent you from missing anything. In the common room and sleeping area:
- Pick up and dispose of any trash.
- Empty trash cans.
- If the guest has checked out, replace the sheets on each bed with fresh sheets.
- Make the bed.
- Leave a “Contoso Special Treat” on each pillow.
- Dust all wooden furniture.
- Clean the coffee station (if necessary) and restock coffee, cups, and condiment packs.
- Vacuum the common room and sleeping areas.
Do not open the courtesy bar. Checking and restocking the courtesy bar is the shift supervisor’s responsibility.
It is important that you give special attention to the restrooms. The most common guest complaint is about restroom cleanliness. We recommend a “top-down” cleaning method for restrooms:
- Clean all mirrors.
- Clean countertops and sinks.
- If damp, wipe down the shower and shower curtain.
- .If necessary, replace toilet paper.
- .Replace used towels and wash cloths.
- Pick up any trash and empty trash cans.
- Sweep the restroom floor and mop if necessary.Final Check
- Make a final check of the room before leaving.
- Are the lights turned off?
- Are the TV and coffee station turned off?
- Is all trash picked up and disposed of?
- Is the restroom door closed?
Close the door firmly and make sure that it locks behind you. Text your supervisor with the room number.
End-of-Shift
When you are finished, dispose of all trash in the large receptacles. Drop all sheets, towels, and other lines into the laundry carts. Restock your cart so that it is ready for the next shift.
If you have more than 30 minutes left after you have completed your assigned rooms, contact your supervisor for additional assignments.
Add a Page Break immediately before the heading “Room Cleaning”.
- See the explanation below.
Correct answer: 1
Explanation:
1. Select the line before the heading “Room Cleaning”. 2. Go to the Insert tab, and select Page Break. OR 1. Select the line before the heading “Room Cleaning”. 2. Press Ctrl+Enter. References:https://support.office.com/en-us/article/Insert-a-page-break-7613FF46-96E5-4E46-9491-40D7D410A043 1. Select the line before the heading “Room Cleaning”.
2. Go to the Insert tab, and select Page Break.
OR
1. Select the line before the heading “Room Cleaning”.
2. Press Ctrl+Enter.
References:
https://support.office.com/en-us/article/Insert-a-page-break-7613FF46-96E5-4E46-9491-40D7D410A043
Question 8
Project 5 of 7: Housekeeping
Overview
You are helping to write training program modules for Contoso Suites. You are editing the second module for housekeeping associates.
Start of Shift
The first thing you should do when you start your shift is check your schedule. The shift supervisor will provide you with a printed schedule listing the rooms for which you are responsible, and a recommended order for cleaning the rooms. Unless an early cleaning is requested by the guest, check-out rooms are given priority so that we can prepare them for the next guests.
Use the inventory checklist attached to your cleaning cart to make sure that your cart is fully stocked before you begin your rounds.
Room Cleaning
When you are ready to clean a room, knock and announce yourself as “Housekeeping.” Give the guest sufficient time to respond (10 to 15 seconds). If the guest does not respond, let yourself into the room and begin cleaning.
Start by cleaning the common room and sleeping areas. It is best to follow consistent steps when cleaning rooms. This will help to prevent you from missing anything. In the common room and sleeping area:
- Pick up and dispose of any trash.
- Empty trash cans.
- If the guest has checked out, replace the sheets on each bed with fresh sheets.
- Make the bed.
- Leave a “Contoso Special Treat” on each pillow.
- Dust all wooden furniture.
- Clean the coffee station (if necessary) and restock coffee, cups, and condiment packs.
- Vacuum the common room and sleeping areas.
Do not open the courtesy bar. Checking and restocking the courtesy bar is the shift supervisor’s responsibility.
It is important that you give special attention to the restrooms. The most common guest complaint is about restroom cleanliness. We recommend a “top-down” cleaning method for restrooms:
- Clean all mirrors.
- Clean countertops and sinks.
- If damp, wipe down the shower and shower curtain.
- If necessary, replace toilet paper.
- Replace used towels and wash cloths.
- Pick up any trash and empty trash cans.
- Sweep the restroom floor and mop if necessary.Final Check
- Make a final check of the room before leaving.
- Are the lights turned off?
- Are the TV and coffee station turned off?
- Is all trash picked up and disposed of?
- Is the restroom door closed?
Close the door firmly and make sure that it locks behind you. Text your supervisor with the room number.
End-of-Shift
When you are finished, dispose of all trash in the large receptacles. Drop all sheets, towels, and other lines into the laundry carts. Restock your cart so that it is ready for the next shift.
If you have more than 30 minutes left after you have completed your assigned rooms, contact your supervisor for additional assignments.
Add a page number to the bottom of each page in the Brackets 2 format.
- See the explanation below.
Correct answer: 1
Explanation:
1. Select Page Number from the Header & Footer group on the Insert tab. 2. Select the desired location and style which in this case is at the bottom of each page in the Brackets 2 format. 3. Select Close Header and Footer. References:https://support.office.com/en-us/article/insert-page-numbers-9f366518-0500-4b45-903d-987d3827c007 1. Select Page Number from the Header & Footer group on the Insert tab.
2. Select the desired location and style which in this case is at the bottom of each page in the Brackets 2 format.
3. Select Close Header and Footer.
References:
https://support.office.com/en-us/article/insert-page-numbers-9f366518-0500-4b45-903d-987d3827c007
Question 9
Project 5 of 7: Housekeeping
Overview
You are helping to write training program modules for Contoso Suites. You are editing the second module for housekeeping associates.
Start of Shift
The first thing you should do when you start your shift is check your schedule. The shift supervisor will provide you with a printed schedule listing the rooms for which you are responsible, and a recommended order for cleaning the rooms. Unless an early cleaning is requested by the guest, check-out rooms are given priority so that we can prepare them for the next guests.
Use the inventory checklist attached to your cleaning cart to make sure that your cart is fully stocked before you begin your rounds.
Room Cleaning
When you are ready to clean a room, knock and announce yourself as “Housekeeping.” Give the guest sufficient time to respond (10 to 15 seconds). If the guest does not respond, let yourself into the room and begin cleaning.
Start by cleaning the common room and sleeping areas. It is best to follow consistent steps when cleaning rooms. This will help to prevent you from missing anything. In the common room and sleeping area:
- Pick up and dispose of any trash.
- Empty trash cans.
- If the guest has checked out, replace the sheets on each bed with fresh sheets.
- Make the bed.
- Leave a “Contoso Special Treat” on each pillow.
- Dust all wooden furniture.
- Clean the coffee station (if necessary) and restock coffee, cups, and condiment packs.
- Vacuum the common room and sleeping areas.
Do not open the courtesy bar. Checking and restocking the courtesy bar is the shift supervisor’s responsibility.
It is important that you give special attention to the restrooms. The most common guest complaint is about restroom cleanliness. We recommend a “top-down” cleaning method for restrooms:
- Clean all mirrors.
- Clean countertops and sinks.
- If damp, wipe down the shower and shower curtain.
- If necessary, replace toilet paper.
- Replace used towels and wash cloths.
- .Pick up any trash and empty trash cans.
- Sweep the restroom floor and mop if necessary.Final CheckMake a final check of the room before leaving.
- Are the lights turned off?
- Are the TV and coffee station turned off?
- Is all trash picked up and disposed of?
- Is the restroom door closed?
Close the door firmly and make sure that it locks behind you. Text your supervisor with the room number.
End-of-Shift
When you are finished, dispose of all trash in the large receptacles. Drop all sheets, towels, and other lines into the laundry carts. Restock your cart so that it is ready for the next shift.
If you have more than 30 minutes left after you have completed your assigned rooms, contact your supervisor for additional assignments.
Change the bulleted list to Picture bullets based on Check.jpg in the Pictures folder.
- See the explanation below.
Correct answer: 1
Explanation:
1. Select the bulleted list which requires the change. 2. Click the arrow next to Bullets from the Paragraph group on the Home tab. 3. Select Define New Bullet. 4. Click Picture, then search for the Check.jpg file in the Pictures folder on the device. 5. Select Insert or OK in order to preview the new bullet in the Define New Bullet dialog box, and then click OK if it is as desired. References:https://support.office.com/en-us/article/Create-custom-bullets-with-pictures-or-symbols-a6bf04a8-be3d-4bec-969a-6196e89da741 1. Select the bulleted list which requires the change.
2. Click the arrow next to Bullets from the Paragraph group on the Home tab.
3. Select Define New Bullet.
4. Click Picture, then search for the Check.jpg file in the Pictures folder on the device.
5. Select Insert or OK in order to preview the new bullet in the Define New Bullet dialog box, and then click OK if it is as desired.
References:
https://support.office.com/en-us/article/Create-custom-bullets-with-pictures-or-symbols-a6bf04a8-be3d-4bec-969a-6196e89da741
Question 10
Project 5 of 7: Housekeeping
Overview
You are helping to write training program modules for Contoso Suites. You are editing the second module for housekeeping associates.
Start of Shift
The first thing you should do when you start your shift is check your schedule. The shift supervisor will provide you with a printed schedule listing the rooms for which you are responsible, and a recommended order for cleaning the rooms. Unless an early cleaning is requested by the guest, check-out rooms are given priority so that we can prepare them for the next guests.
Use the inventory checklist attached to your cleaning cart to make sure that your cart is fully stocked before you begin your rounds.
Room Cleaning
When you are ready to clean a room, knock and announce yourself as “Housekeeping.” Give the guest sufficient time to respond (10 to 15 seconds). If the guest does not respond, let yourself into the room and begin cleaning.
Start by cleaning the common room and sleeping areas. It is best to follow consistent steps when cleaning rooms. This will help to prevent you from missing anything. In the common room and sleeping area:
- Pick up and dispose of any trash.
- Empty trash cans.
- If the guest has checked out, replace the sheets on each bed with fresh sheets.
- Make the bed.
- Leave a “Contoso Special Treat” on each pillow.
- Dust all wooden furniture.
- Clean the coffee station (if necessary) and restock coffee, cups, and condiment packs.
- Vacuum the common room and sleeping areas.
Do not open the courtesy bar. Checking and restocking the courtesy bar is the shift supervisor’s responsibility.
It is important that you give special attention to the restrooms. The most common guest complaint is about restroom cleanliness. We recommend a “top-down” cleaning method for restrooms:
- Clean all mirrors.
- Clean countertops and sinks.
- If damp, wipe down the shower and shower curtain.
- If necessary, replace toilet paper.
- Replace used towels and wash cloths.
- Pick up any trash and empty trash cans.
- Sweep the restroom floor and mop if necessary.
Final Check
Make a final check of the room before leaving.
- Are the lights turned off?
- Are the TV and coffee station turned off?
- Is all trash picked up and disposed of?
- Is the restroom door closed?
Close the door firmly and make sure that it locks behind you. Text your supervisor with the room number.
End-of-Shift
When you are finished, dispose of all trash in the large receptacles. Drop all sheets, towels, and other lines into the laundry carts. Restock your cart so that it is ready for the next shift.
If you have more than 30 minutes left after you have completed your assigned rooms, contact your supervisor for additional assignments.
Add the watermark DO NOT COPY 1 to all pages.
- See the explanation below.
Correct answer: 1
Explanation:
1. Select Watermark from the Design tab. 2. Choose DO NOT COPY 1 watermark from the pre-configured watermarks. References:https://support.office.com/en-us/article/Insert-a-watermark-f90f26a5-2101-4a75-bbfe-f27ef05002de#ID0EABBAAA=Windows_-_newer 1. Select Watermark from the Design tab.
2. Choose DO NOT COPY 1 watermark from the pre-configured watermarks.
References:
https://support.office.com/en-us/article/Insert-a-watermark-f90f26a5-2101-4a75-bbfe-f27ef05002de#ID0EABBAAA=Windows_-_newer
HOW TO OPEN VCE FILES
Use VCE Exam Simulator to open VCE files

HOW TO OPEN VCEX FILES
Use ProfExam Simulator to open VCEX files
ProfExam at a 20% markdown
You have the opportunity to purchase ProfExam at a 20% reduced price
Get Now!